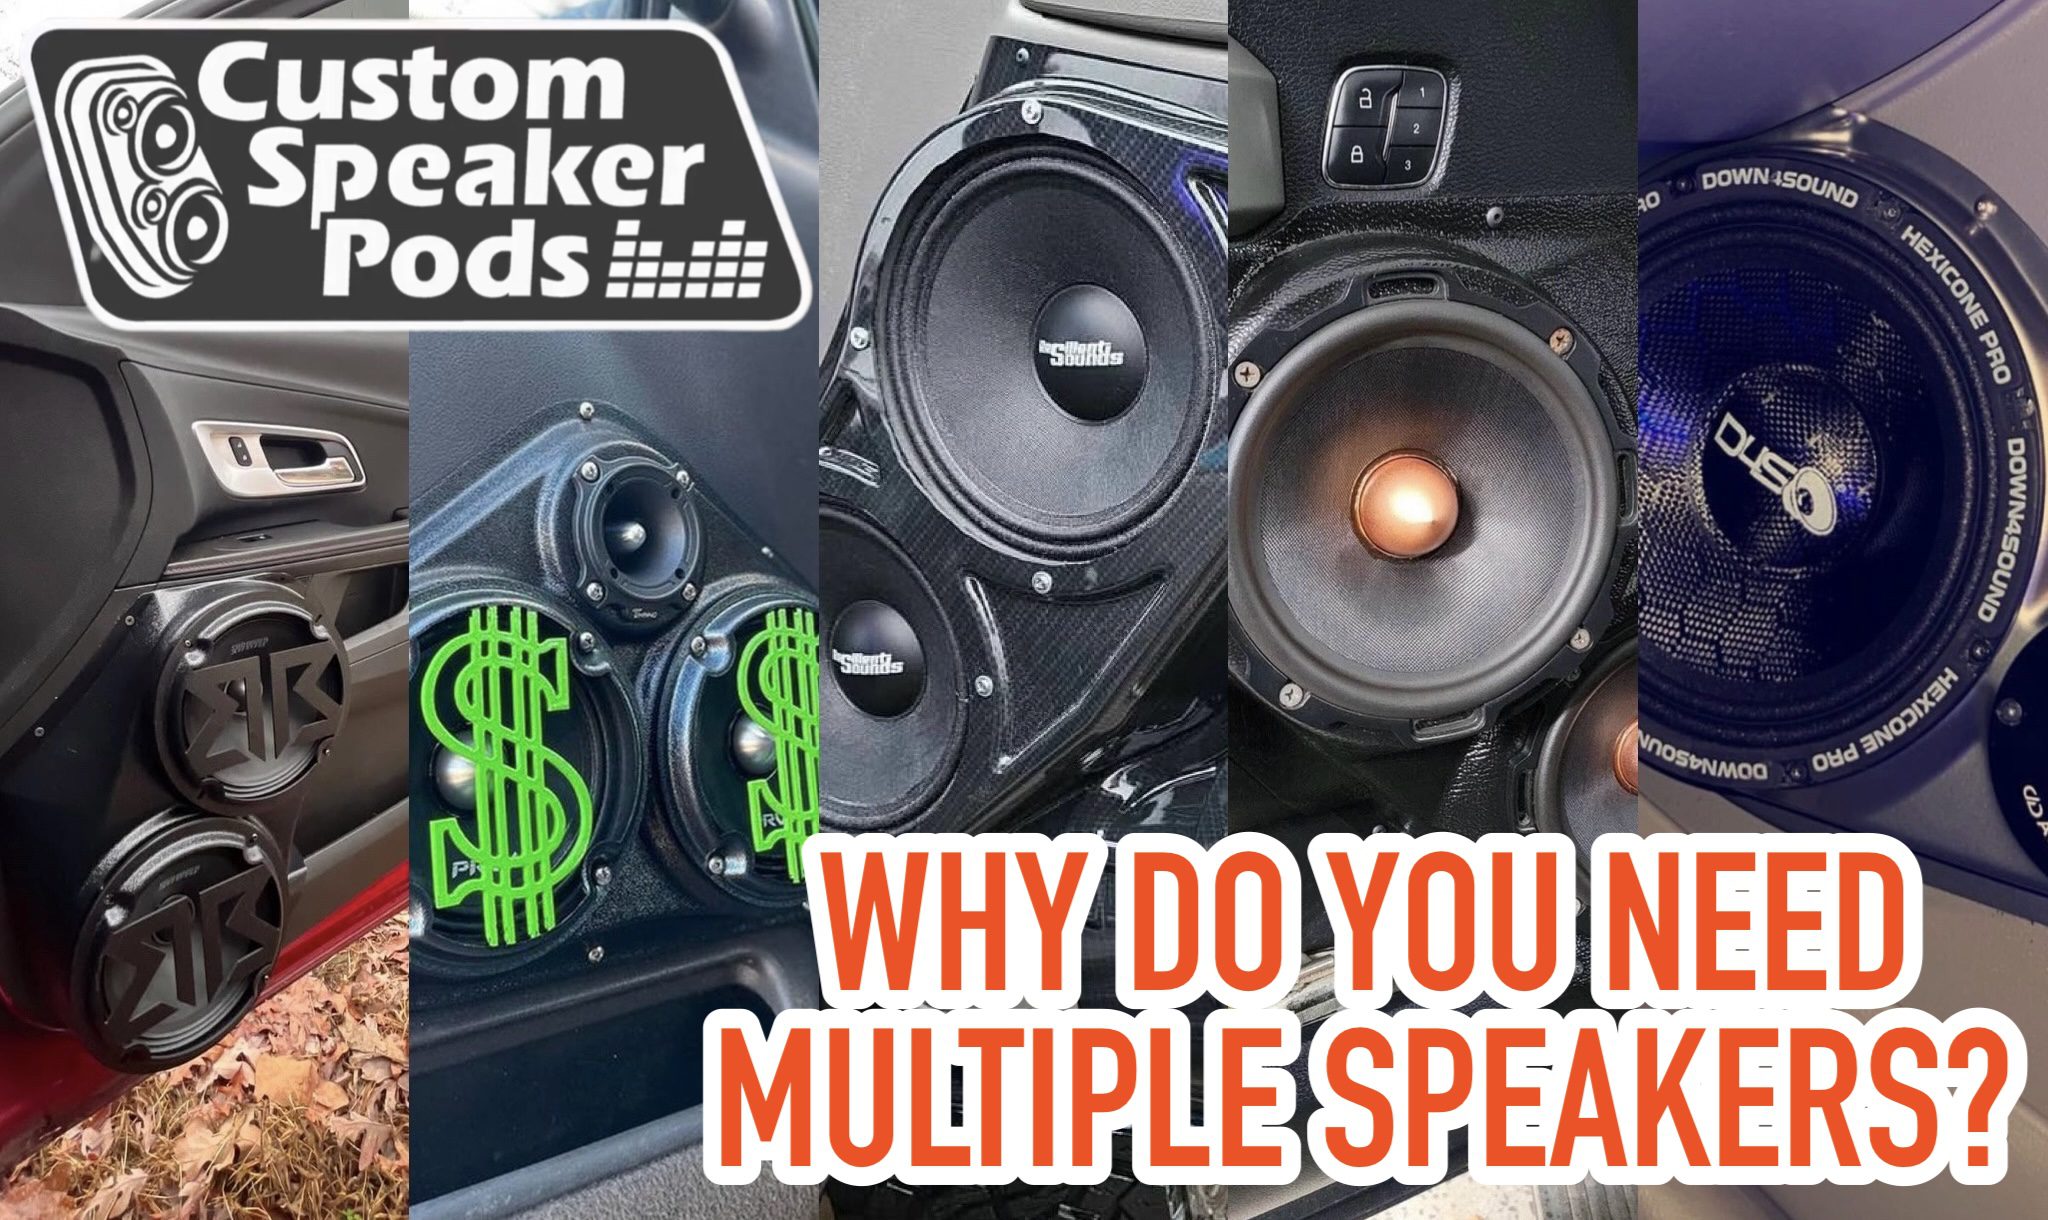
Scary?
Wiring speakers shouldn’t be scary, this is the fun part of car stereo and our wiring diagrams should make it as easy a 4 piece puzzle. There are only a couple things we will discuss here so that you can be knowledgeable about what you are working on. Our wiring diagrams will provide you with the ‘how’ you need to wire your speaker system so only read on if you want to know the ‘why’.
1. Impedance
In the world of car stereo you will hear the word impedance (im-pee-dense). This is nothing more than a fancy word for the resistance of alternating current flow, though there is much more to a speaker than just resistance, but for this conversation it is not important and we will refer to it as resistance going forward.
The resistance of a speaker is measured in Ohms and it is how much the speaker “resists” the passage of electrical current. The higher the resistance value, the harder it is for current to flow and the less current the speaker will allow to pass.
Example: a 4 Ohm speaker will allow more current to pass easier (with less resistance) than an 8 Ohm speaker.
Why is Impedance/Resistance important?
If we get the resistance wrong while wiring up our speaker system bad things can/will happen.
- Too high of a resistance and the speakers will not put out as much sound as they could (Louder is better). This is the better of the two possibilities.
- Too LOW of a resistance and your stereo equipment could fail, overheat or catch on fire.
Keep reading, because we will discuss how to prevent the bad things from happening.
2. Making the music
What makes the music happen?
If we are talking about car stereo than we know that the car stereo head unit (or other music playing device) is the magical window between your fingers and your ears (yeah, just go with me on this). You use your fingers to push a button on the head unit to select the music track you want to hear. The head unit then takes all of the 0’s and 1’s that make up a music track and magically convert it into electrical pulses and signals that go into an amplifier. The pulses and signals gain strength and are sent through a series of wires to a speaker. The speaker transforms these electrical pulses into magnetic waves that push the speaker cone up and down along a circular magnetic track. The speaker cone then moves the air around it so violently that the air has no choice but to comply and move all of the air around it. This moving air hits the ‘speaker cone’ in your ear and converts that into some other type of electrical signal that is sent to your brain. Your brain then processes that signal and sends out new signals to your legs that make you shake your butt.
3. Audio Signals
What is an audio signal?
An audio signal is an alternating current of varying frequencies and amplitudes that combine together to form the music that the speaker reproduces. The audio signal is produced by the stereo head unit (or other music playing device in the vehicle). Most stereo head units have built in amplifiers that increase the output of the audio signal, this increase is what makes the music coming out of the speaker louder. Aftermarket amplifiers still receive the audio signal from the head unit, but they are typically larger and can produce much larger increases in the audio signal sent to the speakers.
4. Watts
Watts/wattage is the way amplifiers are rated in car stereo (there are other metrics that we will discuss as well). A watt is a measure of power and is calculated by multiplying voltage by current. Since a stereo head unit or aftermarket amplifier cannot put out more wattage than it is designed for we need to design our speaker system to maximize either the Voltage, or the Current passing through the system. The easiest way to do this in car audio is to make sure the speakers do not resist the passage of current, and the way we do this is by wiring our speakers in a way that creates the lowest resistance allowed, therefore allowing more current to flow. But, again, doing it wrong can result in bad things (see the end of section 1).
THE LOWEST RESISTANCE ALLOWED IS THE IMPEDANCE RATING OR SPEAKER IMPEDANCE OF THE STEREO COMPONENT! WIRING YOUR SPEAKERS TO A RESISTANCE/IMPEDANCE LOWER THAN THE MANUFACTURERS RATING COULD DAMAGE YOUR EQUIPMENT.
Most aftermarket head units, and factory head units, are designed to have 4 ohm speakers installed. Installing additional speakers, in different wiring configurations, can change the impedance/resistance that the stereo will see.
Aftermarket external amplifiers can have impedance ratings of 4 ohms, 2 ohms and 1 ohm.
4. Wiring speakers: Series vs. Parallel
This is the point where most people get confused and give up. It isn’t that difficult, and it shouldn’t turn anyone away from having a bitchin’ car stereo.
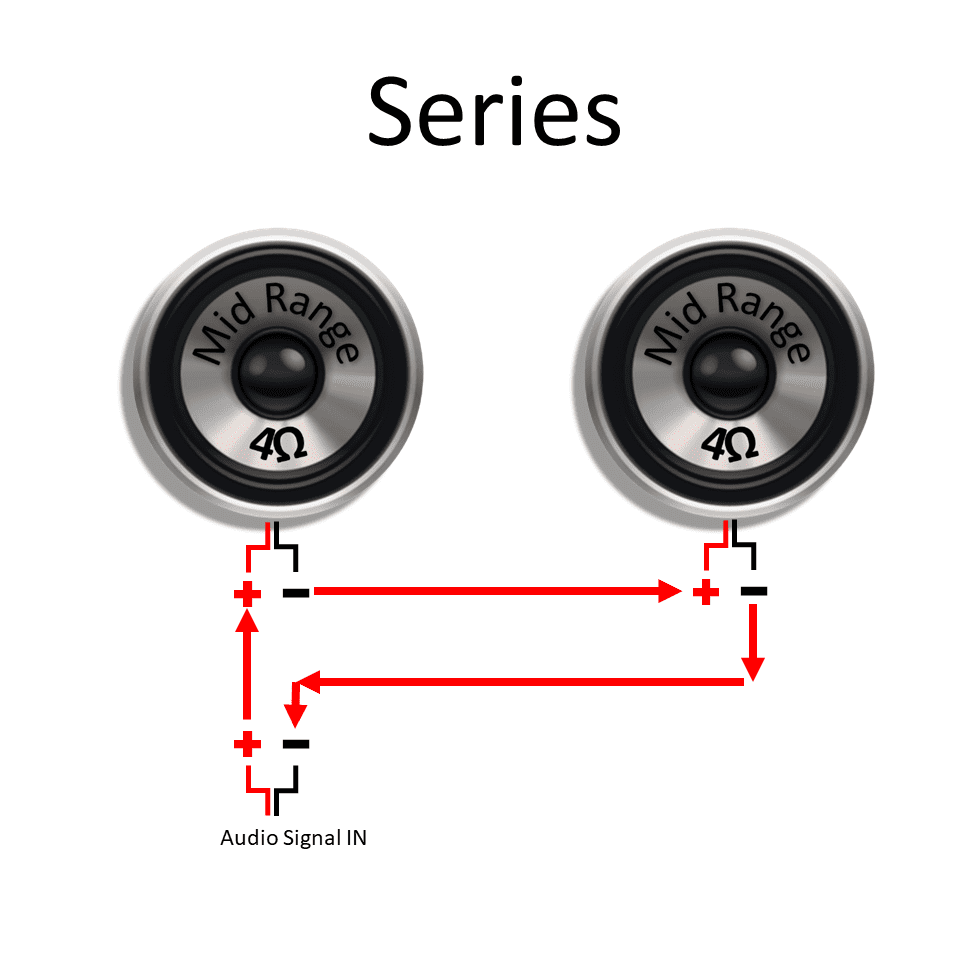
Series speaker wiring is a single ‘loop’, from the signal to one speaker, to the next speaker back to the signal. Wiring two speakers in series means that the both speakers are along one path that current can flow. Single lane highway. A single line cars going down the same road at a constant speed.
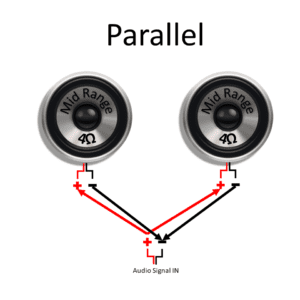
Parallel speaker wiring creates two ‘loops’, one loop from the signal to the speaker back to the signal, the other loop from the signal to the other speaker back to the signal creating two paths that the current can flow. A double lane highway. Same cars, same speed, but twice as many can go at once.
Now putting some math to this simple two speaker system:
Two, 4 ohm speakers in SERIES adds the resistance: 4 ohms PLUS 4 ohms gives you 8 ohms
Two, 4 ohm speakers in PARALLEL divides the resistance by Two: 4 ohms divided by Two gives you 2 ohms
Sorry, I tried to math the road thing, but… Just remember, series is one lane single line of traffic, parallel is two lanes of traffic (twice the cars).
Lower resistance equals more current flow. More current flow means more power/wattage.
5. How should I wire my speakers?
Now that we understand the basics, we need to understand the limits. As stated before, the limiting factor of your stereo system will be the head unit or aftermarket amplifier. The goal is to wire the speakers to the lowest ohm rating that the equipment can handle as this will give us the most power output.
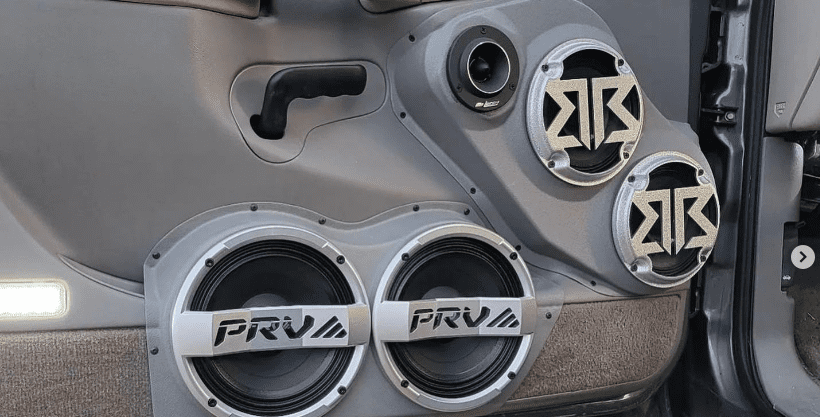
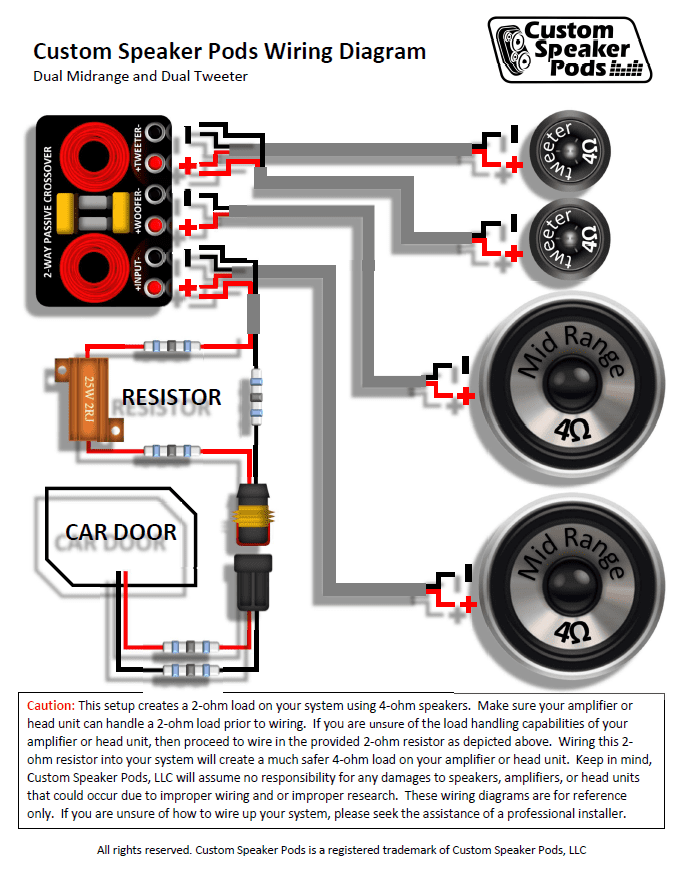
The focus here is to install multiple speakers on a factory head unit or aftermarket head unit as this is a very popular application and requires very little modifications to the vehicles’ electrical system. All of our wiring diagrams will provide you with a 4 ohm load, and we provide you with all of the parts required to achieve this.
We offer an optional 2 ohm load resistor. Since the speakers in our kits are all 4 ohm speakers, and we design the wiring to get the most power out, they are sometimes wired to create a 2 ohm load. Installing the load resistor in series with the speakers will ‘trick’ the head unit into seeing a 4 ohm speaker. Doing this will make the head unit happy and not overheat.
But won’t the resistor limit the current flow, reduce the output power and make the speakers quieter?? Yes, but the tradeoff is safety. Installing a 2 ohm speaker setup on a stereo system that is not designed to handle it will cause the equipment to overheat and potentially fail (either instantly or over time). The benefit of the 2 ohm speaker kit with the 2 ohm resistor is that when you are ready to install a stereo component that can handle the 2 ohm load, such as an aftermarket amplifier, you will only need to remove the load resistor.
Couldn’t I just use 8 ohm speakers wired in parallel to create a 4 ohm load? Yes, but this is not future proof. If down the road you decide to install an aftermarket amplifier you would need to replace your speakers to 4 ohm in order to get the most out of the new equipment.
Could I just not install the resistor? Yes, but this is not recommended as it could potentially damage your equipment. We provide the resistor to ensure you get the best life and experience out of your stereo equipment.
6. The end
If you made it this far I appreciate you (I mean, I still appreciate you even if you didn’t read all of this, but if you didn’t read all of it you wouldn’t know that I still appreciate you…?)
I tried to make it as informative as possible, but I am not an electrical engineer by any means. If you have any questions or concerns please post a comment so we can discuss.
Thanks,
Brandon